Quite often, CRMs do not fit in the pre-defined fields. This is where Custom Fields come in handy, as they allow users to set up their own fields for the CRM and fill Customer profiles with them:
In this lesson, we will do the following:
- Create a Custom Field database table and Model
- Create a pivot table for the Custom Field and Customer relationship
- Create a pivot Model type for Filament to better handle the relationship
- Create simple Custom Field seeders
- Create a Custom Field CRUD (Filament Resource)
- Add Custom Field to the Customer Resource via Repeater Component
- Display Custom Fields on the Customer View page - we will generate them dynamically
Preparing Database, Models and Seeders
Let's start by creating our Custom Fields database. It will have just one field - name:
Migration
Schema::create('custom_fields', function (Blueprint $table) { $table->id(); $table->string('name'); $table->timestamps();});Next, we know that this is going to be a many-to-many relationship, so we need a pivot table:
Migration
use App\Models\Customer;use App\Models\CustomField; // ... Schema::create('custom_field_customer', function (Blueprint $table) { $table->id(); $table->foreignIdFor(Customer::class)->constrained(); $table->foreignIdFor(CustomField::class)->constrained(); $table->string('value'); $table->timestamps();});Then, we can create our Models:
app/Models/CustomField.php
class CustomField extends Model{ protected $fillable = [ 'name' ];}And a pivot Model (Filament uses it to better handle the relationship):
app/Models/CustomFieldCustomer.php
use Illuminate\Database\Eloquent\Relations\BelongsTo;use Illuminate\Database\Eloquent\Relations\Pivot; class CustomFieldCustomer extends Pivot{ public function customer(): BelongsTo { return $this->belongsTo(Customer::class); } public function customField(): BelongsTo { return $this->belongsTo(CustomField::class); }}The last Model to update is the Customer Model, as we need to define the relationship:
Note: This is not a many-to-many relationship, as we use a pivot Model. So we need to use
HasManyinstead ofBelongsToMany. It works the same as many-to-many, but now with an intermediate model!
app/Models/Customer.php
public function customFields(): HasMany{ return $this->hasMany(CustomFieldCustomer::class);}Now, we can create our seeders:
database/seeders/DatabaseSeeder.php
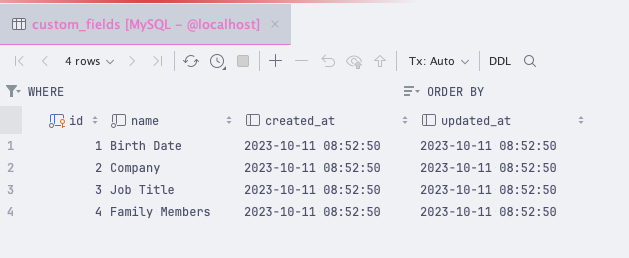
use App\Models\CustomField; // ... public function run(): void{ // ... $customFields = [ 'Birth Date', 'Company', 'Job Title', 'Family Members', ]; foreach ($customFields as $customField) { CustomField::create(['name' => $customField]); }}Running migrations and seeds:
php artisan migrate:fresh --seedShould now give us a few Custom Fields in the database:
Creating Custom Field CRUD
We created the Resource CRUD with this command:
php artisan make:filament-resource CustomField --generateThen, all we had to do - was move the navigation item to the Settings group:
app/Filament/Resources/CustomFieldResource.php
class CustomFieldResource extends Resource{ // ... protected static ?string $navigationIcon = 'heroicon-o-rectangle-stack'; protected static ?string $navigationGroup = 'Settings'; // ...}That's it. We have our Custom Field CRUD in the Settings group:

Adding Custom Field to the Customer Resource
To add our Custom Fields to Customer, we have to modify the Customer Resource form:
app/Filament/Resources/CustomerResource.php
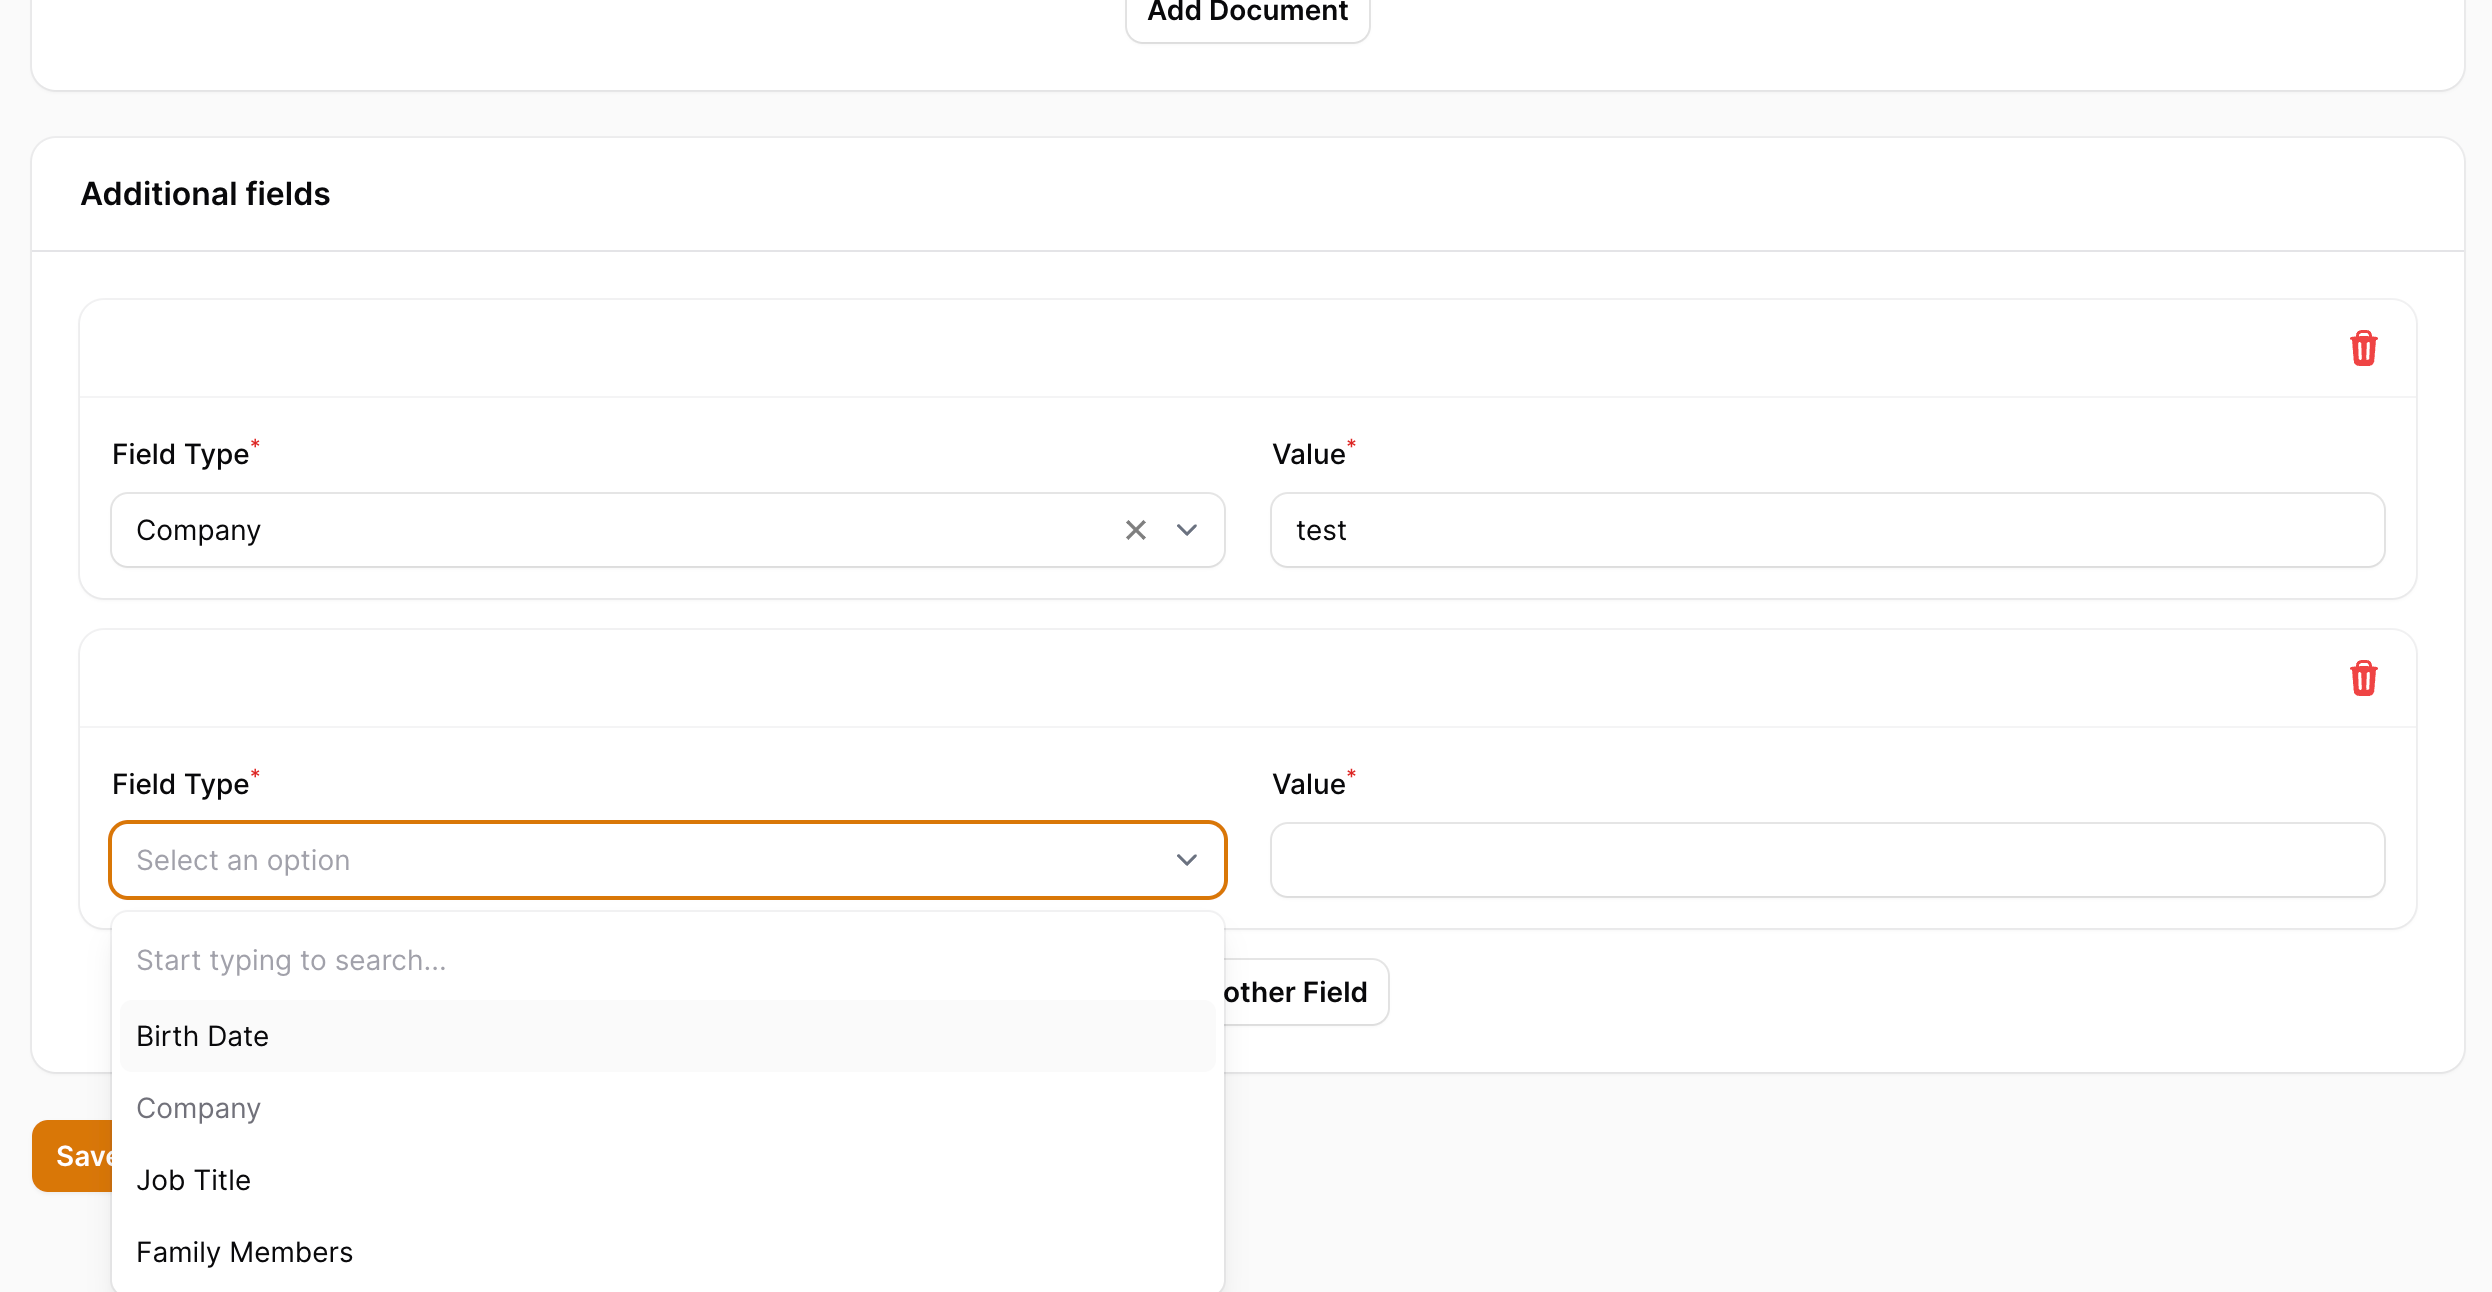
use App\Models\CustomField;use Filament\Forms\Get; // ... public static function form(Form $form): Form{ return $form ->schema([ Forms\Components\Section::make('Customer Details') ->schema([ Forms\Components\TextInput::make('first_name') ->maxLength(255), Forms\Components\TextInput::make('last_name') ->maxLength(255), Forms\Components\TextInput::make('email') ->email() ->maxLength(255), Forms\Components\TextInput::make('phone_number') ->maxLength(255), Forms\Components\Textarea::make('description') ->maxLength(65535) ->columnSpanFull(), ]) ->columns(), Forms\Components\Section::make('Lead Details') ->schema([ Forms\Components\Select::make('lead_source_id') ->relationship('leadSource', 'name'), Forms\Components\Select::make('tags') ->relationship('tags', 'name') ->multiple(), Forms\Components\Select::make('pipeline_stage_id') ->relationship('pipelineStage', 'name', function ($query) { $query->orderBy('position', 'asc'); }) ->default(PipelineStage::where('is_default', true)->first()?->id) ]) ->columns(3), Forms\Components\Section::make('Documents') ->visibleOn('edit') ->schema([ Forms\Components\Repeater::make('documents') ->relationship('documents') ->hiddenLabel() ->reorderable(false) ->addActionLabel('Add Document') ->schema([ Forms\Components\FileUpload::make('file_path') ->required(), Forms\Components\Textarea::make('comments'), ]) ->columns() ]), Forms\Components\Section::make('Additional fields') ->schema([ Forms\Components\Repeater::make('fields') ->hiddenLabel() ->relationship('customFields') ->schema([ Forms\Components\Select::make('custom_field_id') ->label('Field Type') ->options(CustomField::pluck('name', 'id')->toArray()) // We will disable already selected fields ->disableOptionWhen(function ($value, $state, Get $get) { return collect($get('../*.custom_field_id')) ->reject(fn($id) => $id === $state) ->filter() ->contains($value); }) ->required() // Adds search bar to select ->searchable() // Live is required to make sure that the options are updated ->live(), Forms\Components\TextInput::make('value') ->required() ]) ->addActionLabel('Add another Field') ->columns(), ]), ]);} // ...That's it! We will now have a new section in the Customer Resource form where we can add Custom Fields:
Displaying Custom Fields on the Customer View page
Last on our list is the display of Custom Fields when viewing Customer. This will use a dynamic approach, as we don't know how many Custom Fields there will be:
app/Filament/Resources/CustomerResource.php
// ... public static function infoList(Infolist $infolist): Infolist{ return $infolist ->schema([ Section::make('Personal Information') ->schema([ TextEntry::make('first_name'), TextEntry::make('last_name'), ]) ->columns(), Section::make('Contact Information') ->schema([ TextEntry::make('email'), TextEntry::make('phone_number'), ]) ->columns(), Section::make('Additional Details') ->schema([ TextEntry::make('description'), ]), Section::make('Lead and Stage Information') ->schema([ TextEntry::make('leadSource.name'), TextEntry::make('pipelineStage.name'), ]) ->columns(), Section::make('Additional fields') ->hidden(fn($record) => $record->customFields->isEmpty()) ->schema( // We are looping within our relationship, then creating a TextEntry for each Custom Field fn($record) => $record->customFields->map(function ($customField) { return TextEntry::make($customField->customField->name) ->label($customField->customField->name) ->default($customField->value); })->toArray() ) ->columns(), Section::make('Documents') ->hidden(fn($record) => $record->documents->isEmpty()) ->schema([ RepeatableEntry::make('documents') ->hiddenLabel() ->schema([ TextEntry::make('file_path') ->label('Document') ->formatStateUsing(fn() => "Download Document") ->url(fn($record) => Storage::url($record->file_path), true) ->badge() ->color(Color::Blue), TextEntry::make('comments'), ]) ->columns() ]), Section::make('Pipeline Stage History and Notes') ->schema([ ViewEntry::make('pipelineStageLogs') ->label('') ->view('infolists.components.pipeline-stage-history-list') ]) ->collapsible() ]);} // ...With this addition, we used the Collections map method to create a new array from our Custom Fields list. This allows us to display any number of Custom Fields without hardcoding them. We will also hide the section if our Customer has no custom fields. Here's what the View looks like:

That's it for this lesson! We now have a fully working Custom Fields system that allows us to add any number of fields to our Customers.
in the CustomFieldCustomer you need to add the namespace also namespace App\Models;
Sorry, not sure I understand what the issue is here.
Great series, thank you for sharing.
Using the php artisan make:model CustomFieldCustomer -m I usually get the following: Schema::create(‘custom_filed_customers’, function (Blueprint $table) However yours has: Schema::create(‘custom_filed_customer’, function (Blueprint $table)
So my issue is that the code you have is looking for the database without a S and the Make:model adds the S.
So Do I have to change my migration or can we change something some ware else to fix the problem?
To be fully honest with you - I never use artisan commands to create
pivottables. But in case you did, yeah - you need to change the migration to match what Laravel guesses.It's a bit confusing, but pivot tables are "special" in some ways. One of them - they don't follow typical model naming conventions as they usually don't have a model associated with them.
You can use protected $table = 'YOURCUSTOMTABLE';
First, really congrats for your course. I am enjoying a lot. You have been really doing a great course of filament, and at the same time "light"; so you don't enter in artisan details and things like this. However I think that this part of code needs a deeper explanation:
I am looking in filament documentation and I am getting to understand, however I think that can be part of the course.
Could you expand on what exactly needs more explanation here? This is mainly a Laravel thing, so we did not think to include this with filament
Hi Modestas,
I have almost complete the course, programming the CMS "in paralelel"... and I have not seen anyother sites the structure "$get('../*.custom_field_id')" , and neither the method "reject()" or the "contrains()"
Thanks
The
$get()thing comes from thedata_get()method found in Laravel. This allows you to walk an array like it would be a file path (easiest explanation, but not quite identical). In this example, we went one level higher and looking at*index (this will take current field index) to find a fieldcustom_field_idand get it's value.In other words - this looks at all array for
custom_field_idand collects them into a collection.From there, we are using
reject()to remove (filter) entries. You simply check each entry within a closure and reject them from a list if they match.And lastly
contains()is checking if the value is still available.Hope that helps, but I am now aware on how complicated that might be at the start, sorry! This seemed like a typical workflow that you can expect with collections and their magic :)
It helps really! Nothing to sorry about, to clarify details in the comments is the way.
I think this explanation can be in the content course. Any way, I hope here in the comments can be found as well.
I am really surprised of the elegance of the "Pivot-inter-Model" philosophy. Thanks for that tip. I have not seen it before.
However, I would like to improve it a bit, because for example I don't like that everything have to be a "string", clearly there is a better mysql column type for "date of birth".
If we would like to have different types of "custom fields" (strings, dates, booleans, integers...), I am thinking in to have several "Type"_custom_field_customer for every type:
However, I have not clear what to do in the models "CustomFieldCustomer.php" and "Customer.php" because I need to unificate another time the return...
I know that this matter is out of the scope of the course... however if you have any comment or help I would really appreciate. I hope it can help others as well.
While you are correct with the fact that having everything as
stringis pretty bad - the solutions to the problem are so complex that... It does not make much sense to make it. Here's what you would encounter:That said, you would essentially move the load from database (which is pretty fast with indexes!) to PHP side, which is much slower at dealing with this. And while it solves one problem, it will eventually create another.
ps. I'm not saying it is not possible, but in my experience using that system - it always caused more issues and we just reverted back to single column :)
I'm having issues writing tests for this kind of Pivot Model. Here's a test I have written for the tags, which also have a many-to-many relationship but I'm not using the Pivot Model, I'm simply using a BelongsToMany in the controllers. For the life of me, I can't seem to adapt the code for this kind of model. The attach() isn't available in the hasMany relationship, I kind of understand why, but I just can't figure out how to write a working. I know how to write a totally different test, using TableActions tests using Filament, but figuring this out would greatly help my understanding of the underlying code...
If anyone have a clue, it would greatly help.
Thanks!
Ok I,ve figured it out, here's my code if anyone is interested :