We are entirely done with the student and the teacher areas, so let's recap and repeat the same thing for the third role of admin.
Seeder
First, let's seed the third third role.
app/database/seeders/DatabaseSeeder.php:
class DatabaseSeeder extends Seeder{ public function run(): void { Role::create(['name' => 'student']); Role::create(['name' => 'teacher']); Role::create(['name' => 'admin']); }}Also, we don't allow admins to register, so let's create this user in the seeder. The most important parameter is to set role_id when making an admin user.
app/database/seeders/DatabaseSeeder.php:
use App\Models\User; class DatabaseSeeder extends Seeder{ public function run(): void { Role::create(['name' => 'student']); Role::create(['name' => 'teacher']); Role::create(['name' => 'admin']); User::factory()->create([ 'name' => 'Admin', 'role_id' => 3, ]); }}We can re-migrate and seed the admin user.
php artisan migrate:fresh --seedAt this point, we can already log in as an admin, but we don't have an admin area. So, let's do a lot of save as to new files for the admin layout and other files. By doing that, you will kind of repeat all the things that we've done in the previous lessons.
Controller and Routes
First, let's create a Controller.
php artisan make:controller Admin/UserControllerapp/Http/Controllers/Admin/UserController.php:
use Illuminate\Contracts\View\View;use App\Http\Controllers\Controller; class UserController extends Controller{ public function index(): View { return view('admin.users'); }}Next, add this Controller to the Routes by creating a new Route group.
routes/web.php:
use Illuminate\Support\Facades\Route;use App\Http\Controllers\ProfileController;use App\Http\Controllers\Student;use App\Http\Controllers\Teacher;use App\Http\Controllers\Admin; Route::get('/', function () { return view('welcome');}); Route::middleware(['auth', 'verified'])->group(function () { Route::prefix('student') ->middleware('role:1') ->name('student.') ->group(function () { Route::get('timetable', [Student\TimetableController::class, 'index']) ->name('timetable'); }); Route::prefix('teacher') ->middleware('role:2') ->name('teacher.') ->group(function () { Route::get('timetable', [Teacher\TimetableController::class, 'index']) ->name('timetable'); }); Route::prefix('admin') ->middleware('role:3') ->name('admin.') ->group(function () { Route::get('user', [Admin\UserController::class, 'index']) ->name('users'); }); }); Route::middleware('auth')->group(function () { Route::get('/profile', [ProfileController::class, 'edit'])->name('profile.edit'); Route::patch('/profile', [ProfileController::class, 'update'])->name('profile.update'); Route::delete('/profile', [ProfileController::class, 'destroy'])->name('profile.destroy');}); require __DIR__ . '/auth.php';Blade View and Layout
Now, let's create a View file. The content of the View file will be identical to any of the timetable View files, only with different text.
resources/views/admin/users.blade.php:
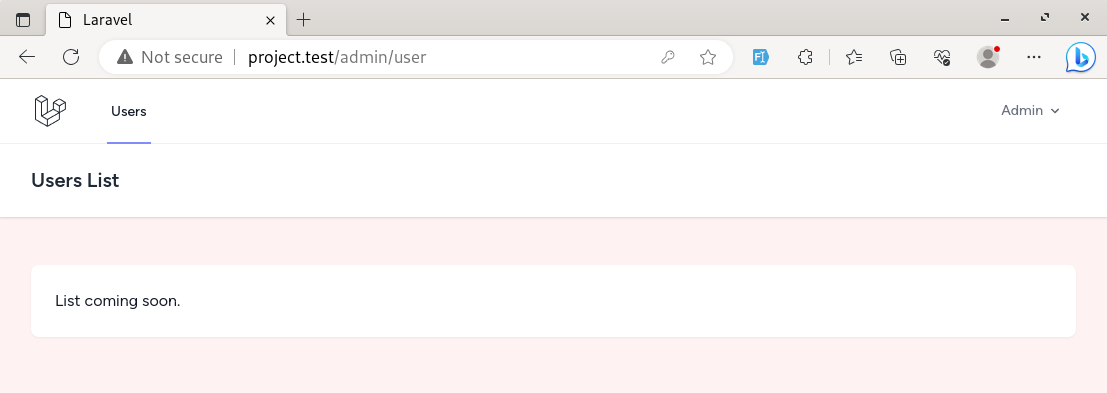
<x-admin-layout> <x-slot name="header"> <h2 class="font-semibold text-xl text-gray-800 dark:text-gray-200 leading-tight"> {{ __('Users List') }} </h2> </x-slot> <div class="py-12"> <div class="max-w-7xl mx-auto sm:px-6 lg:px-8"> <div class="bg-white dark:bg-gray-800 overflow-hidden shadow-sm sm:rounded-lg"> <div class="p-6 text-gray-900 dark:text-gray-100"> {{ __('List coming soon.') }} </div> </div> </div> </div></x-admin-layout>In this View, we used a new layout Blade component, admin-layout. We must create it now.
Using your editor, save as one of the layouts class files or copy its content to a new AdminLayout PHP class, change the class name, and return the View file name.
app/View/Components/AdminLayout.php:
use Illuminate\View\View;use Illuminate\View\Component; class AdminLayout extends Component{ public function render(): View { return view('layouts.admin'); }}Repeat the process from the other View layout files. Change only the navigation path. Then, change the background color.
resources/views/layouts/admin.blade.php:
<!DOCTYPE html><html lang="{{ str_replace('_', '-', app()->getLocale()) }}"> <head> <meta charset="utf-8"> <meta name="viewport" content="width=device-width, initial-scale=1"> <meta name="csrf-token" content="{{ csrf_token() }}"> <title>{{ config('app.name', 'Laravel') }}</title> <!-- Fonts --> <link rel="preconnect" href="https://fonts.bunny.net"> <link href="https://fonts.bunny.net/css?family=figtree:400,500,600&display=swap" rel="stylesheet" /> <!-- Scripts --> @vite(['resources/css/app.css', 'resources/js/app.js']) </head> <body class="font-sans antialiased"> <div class="min-h-screen bg-red-50 dark:bg-gray-900"> @include('layouts.navigation.admin') <!-- Page Heading --> @isset($header) <header class="bg-white dark:bg-gray-800 shadow"> <div class="max-w-7xl mx-auto py-6 px-4 sm:px-6 lg:px-8"> {{ $header }} </div> </header> @endisset <!-- Page Content --> <main> {{ $slot }} </main> </div> </body></html>Remember to re-compile classes:
npm run devornpm run build.
Then, repeat the same process to create the admin navigation from any other navigation. The admin layout will have navigation items for the user list page.
resources/views/layouts/navigation/admin.blade.php:
<nav x-data="{ open: false }" class="bg-white dark:bg-gray-800 border-b border-gray-100 dark:border-gray-700">// ... <div class="flex"> <!-- Logo --> <div class="shrink-0 flex items-center"> <a href="{{ route('admin.users') }}"> <x-application-logo class="block h-9 w-auto fill-current text-gray-800 dark:text-gray-200" /> </a> </div> <!-- Navigation Links --> <div class="hidden space-x-8 sm:-my-px sm:ms-10 sm:flex"> <x-nav-link :href="route('admin.users')" :active="request()->routeIs('admin.users')"> {{ __('Users') }} </x-nav-link> </div> </div>// ...</nav>Auto-Redirect After Login/Register
Also, we must add the redirect for the admin role.
app/Models/User.php:
class User extends Authenticatable{ // ... public function getRedirectRouteName(): string { return match ((int) $this->role_id) { 1 => 'student.timetable', 2 => 'teacher.timetable', 3 => 'admin.users', }; }}After logging in with the admin user, we should be redirected to the correct page. Other pages will not be accessible.
Course Conclusion
That's it. We've completed the fundamental architecture for three different roles with three layouts and three route groups.
Their controllers are separated by namespaces, and views are also separated in their folders. You can work on each of them separately. Come up with different designs or logic only for teachers, students, or admins.
I hope this quick walk-through was helpful.
Repository is available on GitHub here.
Great Course, simle and practical, thank you!
Thank you for this good course
Very interesting course.
Considering cases in which a page should only display data related to the logged in user. What would you suggest? Traits? Maybe Scopes? It would be a good class to enhance this course
Thank you for your support as always.
You're talking about multi-tenancy, here's the material we have on that one: //tag/multi-tenancy
Hi my friend, I hope you are well.
I was even referring to small applications like the one mentioned in the course where there would be no need for multi tenancy. For example:
Teacher view only disciplines/students of its scope. Student view only their courses. etc
Anyway, I managed to build here using scope to filter and trait to set user_id without the need to handle this in each data manipulation.
Thank you so much for your support as always.
Well yes, that's exactly what I'm talking about: "multi-tenancy" is a global term that can mean multiple implementations - from separate databases with complex solution, to an easy trait-scope based one like yours. It's still multi-tenancy :)
Just yesterday, we published the same trait-scope example based on Filament as a separate tutorial.
Hello Povilas, I had read a tutorial //post/laravel-multi-tenancy-multi-database-example that made me think about the possibility of making this procedure a little simpler.
I just read the //post/multi-tenancy-laravel-filament-simple tutorial and it brings a simplified approach that fits these scenarios perfectly.
Thank you for your support as always.
Can you do something similar to this using Filament?
What exactly you are looking for here? There is a few things shown in this.
But this might help you:
Yes like these using Different panels for three different types of users.
Tried to get the profile to work after finishing this class but I cannot get it to work any suggestions?
it has taken a lot of work but I got it to work. you can see what I did on my GitHub under branchTesting https://github.com/rhoyle/branchTesting
Ok just found a nether hiccup in this Under the Delete User Account it does not work getting Error Method Illuminate\Auth\RequestGuard::logout does not exist.
Any help would be appreciated.