The final part of this simple CRUD is Create and Edit forms. They will be similar, with a few differences. Let's start with adding a new task.
Link to Create Task Page
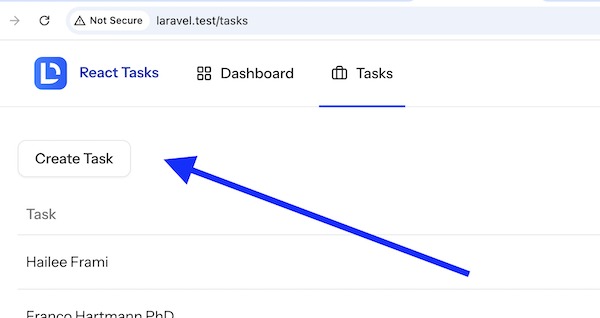
First, let's add a link above the table to lead to the Route for creating the task.
In the Laravel Routes, we have Route::resource('tasks', TaskController::class), so we need to link to the /tasks/create URL.
To do that in our Index.tsx, we import the Link component and add this button-style link above the table.
resources/js/pages/Tasks/Index.tsx
import { Head, router } from '@inertiajs/react'; import { Head, Link, router } from '@inertiajs/react'; // ... <Head title="Tasks List" /> <div className={'mt-8'}> <Link className={buttonVariants({ variant: 'outline' })} href="/tasks/create"> Create Task </Link> <Table className={'mt-4'}>This is the visual result:
Now, let's build the page for the Create form.
Create Task: Empty "Skeleton" Page
In the Controller, we have this:
app/Http/Controllers/TaskController.php:
public function create(){ return Inertia::render('Tasks/Create');}So, we need to create the appropriate React component. For now, let's hard-code some text inside.
resources/js/pages/Tasks/Create.tsx:
import AppLayout from '@/layouts/app-layout';import { Head } from '@inertiajs/react'; export default function Create() { return ( <AppLayout> <Head title="Create Task" /> <div className="flex h-full flex-1 flex-col gap-4 rounded-xl p-4"> Form will be here. </div> </AppLayout> );}Now, when we click the "Create Task" link/button, we will see this:
![]()
Now, let's build the actual form. It will have only one input element: task name. But even for that, we will create a more complex structure, so you will learn the general process of how to build forms in React + Inertia.
Inertia useForm()
First, we need to import and use a useForm from Inertia React.
resources/js/pages/Tasks/Create.tsx:
import { Head } from '@inertiajs/react'; import { Head, useForm } from '@inertiajs/react'; // ... export default function Create() { const { data, setData, errors, post, reset, processing } = useForm({ name: '', }); TypeScript: Adding the Type
Then, we define the type for our form if we want to follow TypeScript conventions. Again, as mentioned earlier, it's optional.
We can also define the types inline in the same file instead of hiding them in the separate types file.
resources/js/pages/Tasks/Create.tsx:
// ...import { Head, useForm } from '@inertiajs/react'; type CreateTaskForm = { name?: string;} export default function Create() { const { data, setData, errors, post, reset, processing } = useForm({ const { data, setData, errors, post, reset, processing } = useForm<Required<CreateTaskForm>>({ name: '', });Build the Form HTML
This is our HTML+JS code using the already pre-installed Shadcn components.
resources/js/pages/Tasks/Create.tsx:
import InputError from '@/components/input-error';import { Button } from '@/components/ui/button';import { Input } from '@/components/ui/input';import { Label } from '@/components/ui/label';import { useRef } from 'react'; // ... export default function Create() { const taskName = useRef<HTMLInputElement>(null); // ... return ( <AppLayout> <Head title="Create Task" /> <div className="flex h-full flex-1 flex-col gap-4 rounded-xl p-4"> <form className="space-y-6"> <div className="grid gap-2"> <Label htmlFor="name">Task Name *</Label> <Input id="name" ref={taskName} value={data.name} onChange={(e) => setData('name', e.target.value)} className="mt-1 block w-full" /> <InputError message={errors.name} /> </div> <div className="flex items-center gap-4"> <Button disabled={processing}>Create Task</Button> </div> </form> </div> </AppLayout> );Here's the visual result!

Form Submit Action and Validation
Finally, we need to define what happens after the form is submitted.
A reminder of what we have in Controller:
app/Http/Controllers/TaskController.php:
public function store(StoreTaskRequest $request){ Task::create($request->validated() + ['is_completed' => false]); return redirect()->route('tasks.index');}In the React component, we create a method that calls the Laravel route of tasks.store and passes the data from the form.
resources/js/pages/Tasks/Create.tsx:
import { useRef } from 'react'; import { FormEventHandler, useRef } from 'react'; // ... export default function Create() { // ... const createTask: FormEventHandler = (e) => { e.preventDefault(); post(route('tasks.store'), { forceFormData: true, preserveScroll: true, onSuccess: () => { reset(); }, onError: (errors) => { if (errors.name) { reset('name'); taskName.current?.focus(); } }, }); }; return ( <AppLayout> <Head title="Create Task" /> <div className="flex h-full flex-1 flex-col gap-4 rounded-xl p-4"> <form onSubmit={createTask} className="space-y-6">The code should be pretty readable and self-explanatory. You may have seen the taskName variable above, and it may make sense from this piece of code: it's used to refocus that input in case of validation errors.
Speaking of validation errors, they will work automatically, coming from the back-end Controller, shown with the <InputError> component:

But if we pass a valid task name, we get redirected to the table, where we see our new task!

Here's the GitHub commit for both Create form and upcoming Edit form.
In the next lesson, we will build the Edit Task form.
Great course ... I have stayed away from React but I am jumping in with full force.
How would we add the toaster to be shown on the create and edit forms? I would think it should go in the controller but I am not sure how to import Sonner.
Thanks
To do that, you might want to look into https://inertiajs.com/shared-data#flash-messages
From there, you need to retrieve that flash message on your page and trigger a toast notification. In my case, I had to do something like this: