In the previous lesson, we fixed our first bug, reported by the client. But what if some bug happens for other users who wouldn't report it? Can we track those bugs somewhere, in addition to Laravel logs?
There are quite a few bug tracking/monitoring tools - the most popular in the Laravel community is Sentry. Here's a typical error list from Sentry.
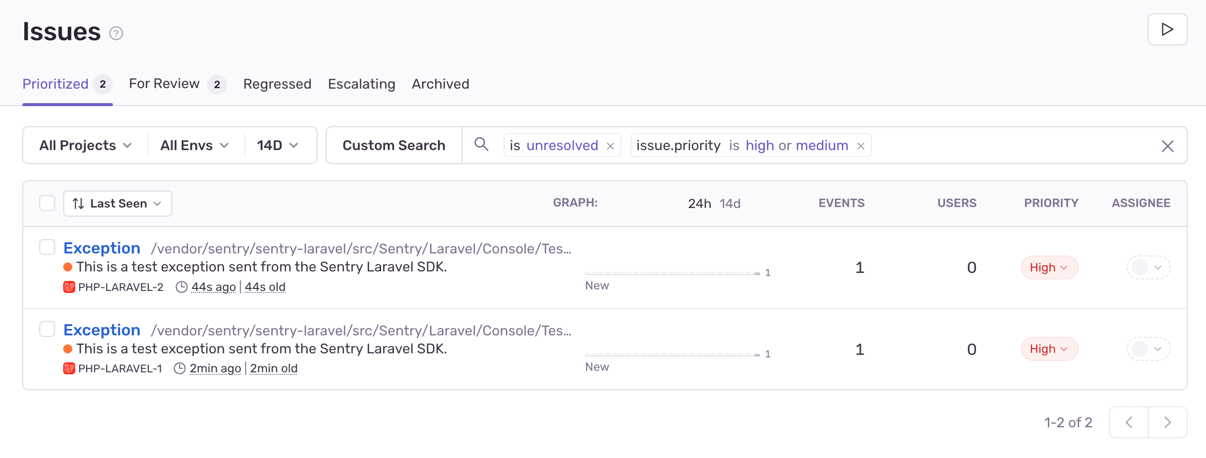
In this lesson, we will show Sentry in action.
Other well-known bug-tracking alternatives are BugSnag and Flare. They all work similarly but with slightly different feature sets and pricing. Check their homepages for more details.
In addition to the list of issues, Sentry has a log viewer, too:

So, let's add Sentry to our app and simulate a bug locally.
Adding Sentry
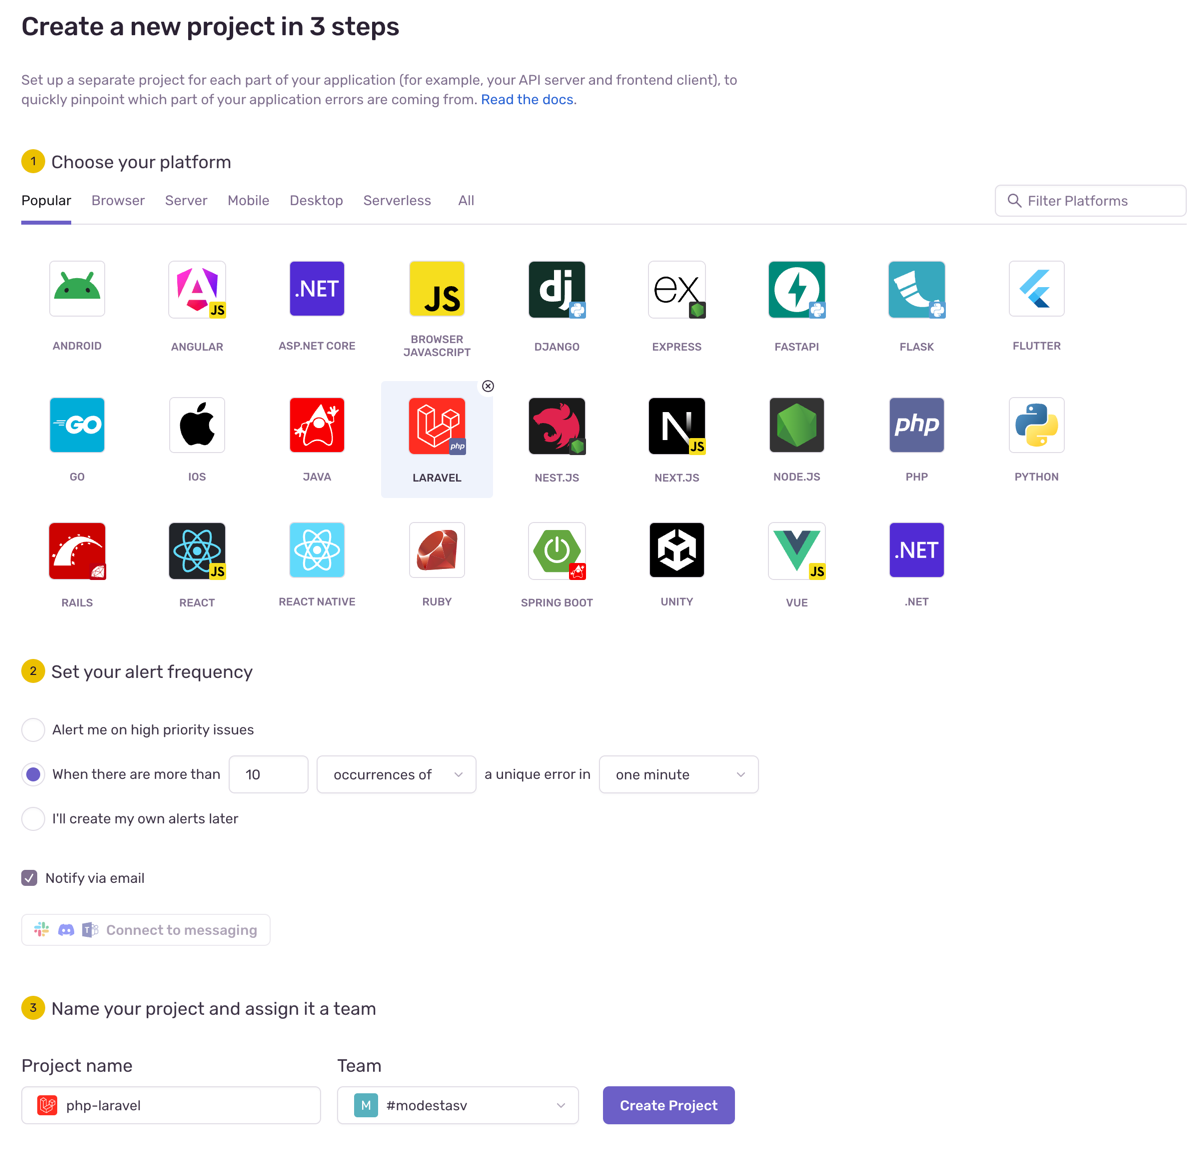
Adding Sentry is easy - create an account at Sentry.io and start a new project. In there, select Laravel:
Once created, it will give you detailed instructions on how to install Sentry in your app:

Follow them, and you should have Sentry installed in no time.
Note: Keep your SENTRY_LARAVEL_DSN key safe. It's like a password; you don't want to share it with anyone.
1 - Install the Sentry package:
composer require sentry/sentry-laravel2 - Install extension for Sentry:
Note: This does not support Windows. Only Linux and macOS.
pecl install excimer3 - Add Integration to Laravel:
bootstrap/app.php
use Illuminate\Foundation\Application;use Illuminate\Foundation\Configuration\Exceptions;use Illuminate\Foundation\Configuration\Middleware;use Sentry\Laravel\Integration; return Application::configure(basePath: dirname(__DIR__)) ->withRouting( web: __DIR__.'/../routes/web.php', commands: __DIR__.'/../routes/console.php', health: '/up', ) ->withMiddleware(function (Middleware $middleware) { // }) ->withExceptions(function (Exceptions $exceptions) { Integration::handles($exceptions); })->create();4 - Publish the config file:
php artisan sentry:publish --dsn=XXXXXXXXXXXXXXXXXXXXXXXXThis will ask you two questions. We answered yes to both. This will create a sentry.php file in your config folder and fill .env with the SENTRY_LARAVEL_DSN key.
Testing Sentry Integration: Simulate a Bug
There are two ways to verify the integration:
Test 1: Trigger a sample "fake" error
php artisan sentry:testThis will send an error message to Sentry:

And we should see it in the Sentry dashboard:
Test 2: Trigger a bug in the code
With this one, we can manually trigger an error in our code. For example, we will call a function on our Link model that doesn't exist:
resources/views/links/index.blade.php
{{-- ... --}} <tr> <td class="border px-4 py-2">{{ $link->title }}</td> <td class="border px-4 py-2">{{ $link->formatted_title() }}</td> {{-- ... --}}</tr> {{-- ... --}}Now, if we visit the Links list - we should get an error:

And we should see it in the Sentry dashboard:

Clicking on the error will give us more details:
As you can see - there is A LOT OF DETAILS... In fact, it's a bit overwhelming. But we can see the error message, the stack trace, and the request that caused the error.
Note: We recommend familiarizing yourself with the Sentry dashboard. It's a powerful tool for debugging your app. Play around with it and see what it can do.
Now that we are done with Sentry revert the changes we made to the code:
resources/views/links/index.blade.php
{{-- ... --}} <tr> <td class="border px-4 py-2">{{ $link->title }}</td> <td class="border px-4 py-2">{{ $link->formatted_title() }}</td> {{-- ... --}}</tr> {{-- ... --}}Adding .env.example Keys
An essential part of working with a team is handling various 3rd-party keys in a .env file. If we add something there, we need to add the key of those lines into the .env.example file so other developers would know what keys are required to make the app work on their environment and on staging/live in the future.
.env.example
# ...VITE_APP_NAME="${APP_NAME}" SENTRY_LARAVEL_DSN=SENTRY_TRACES_SAMPLE_RATE=1.0The difference is that the .env file is NOT pushed to the repository; it's private for every developer/server. On the contrary, the .env.example exists in the repository and serves as a "template" for everyone. Without this, they would have to guess what keys are needed and face errors when running the app.
Wrapping Up
That's it! Sentry is now integrated into our app. We can now monitor our app for errors and crashes. Let's push the changes to GitHub:
git add .git commit -m "Add Sentry to the application - resolves #18"git push origin feature/sentryAnd, of course, we create a PR to develop and merge it.
Note: We will stop showing the PR merging screens as that should be standard going forward.
Configure Sentry on Staging/Live Server
When pushing the changes from the dev or main branches to the staging/live servers, you will have to modify the server's .env file and add the required keys that are different from your local ones. A typical practice is to create a separate Sentry project for staging and live environments with different .env keys.
That is it!
In the next lesson, we will work on another 3rd-party integration: Social Login with Google. This will speed up signing up and logging in for our users.
No comments yet…