Our client looked at the application and asked if we could automatically generate the header and footer text.
Well, of course, we can! But the question is, which service should we use, and how should we set it up? After some research, we decided to use OpenAI API, but we give ourselves the flexibility to switch to another service if needed.
In this lesson, we will implement:
- Add text generation with multiple provider support
- Add buttons to generate the text
This will be done using one of the most popular design patterns - Strategy.
Note: You can learn more about patterns in our Design Patterns in Laravel 11 course.
Creating Text Generation Service
Let's start by creating an Enum to store our supported Providers:
app/Enums/TextGenerationProviders.php
namespace App\Enums; enum TextGenerationProviders: string{ case OPENAI = 'openai'; case CLAUDE = 'claude'; // TODO case GEMINI = 'gemini'; // TODO}This Enum will be used in a few places:
- Validate the Request to make sure the provider is supported
- Switch between providers in the Service
Next, let's create a Service to generate the text for us. We will focus on the Strategy pattern here to automatically switch between providers:
app/Services/TextGeneration/TextGenerationService.php
use App\Enums\TextGenerationProviders;use Exception; class TextGenerationService{ public function getHeader(int $userId, string $provider): string { return match ($provider) { TextGenerationProviders::OPENAI->value => (new OpenAi)->getHeader($userId), default => throw new Exception('Provider not supported'), }; } public function getFooter(int $userId, string $provider): string { return match ($provider) { TextGenerationProviders::OPENAI->value => (new OpenAi)->getFooter($userId), default => throw new Exception('Provider not supported'), }; }}Of course, this Manager can't work without the Interface and the first implementation of the Provider:
app/Services/TextGeneration/TextGenerator.php
namespace App\Services\TextGeneration; interface TextGenerator{ public function getHeader(int $userId): string; public function getFooter(int $userId): string;}Each of our different Generators will implement this Interface. Let's start with OpenAI:
Getting OpenAI to Work
First, we need to clarify our workflow with OpenAI. The goal here is to generate an email header and footer based on the links provided by the user. We will use the OpenAI API to generate the text.
So imagine the workflow like this:
- User creates Links in our system
- The user clicks a button to generate the header or footer
- We generate a prompt using Link titles to give context
- We add some rules to the prompt
- We send the prompt to the OpenAI API
- We get the generated text back
This workflow will be implemented in the OpenAI class like this:
app/Services/TextGeneration/OpenAi.php
use App\Models\Link;use Exception;use Illuminate\Support\Facades\Http;use function Sentry\captureException; class OpenAi implements TextGenerator{ public function getHeader(int $userId): string { $prompt = view('text-generation.openai.header', [ 'linkTitles' => Link::query() ->where('user_id', $userId) ->whereNull('issue_id') ->pluck('title'), ])->render(); return $this->callOpenAI($prompt); } public function getFooter(int $userId): string { $prompt = view('text-generation.openai.footer', [ 'linkTitles' => Link::query() ->where('user_id', $userId) ->whereNull('issue_id') ->pluck('title'), ])->render(); return $this->callOpenAI($prompt); } private function callOpenAI(string $prompt): string { try { $aiQuery = Http::withToken(config()->string('services.ai.openai.key')) ->asJson() ->acceptJson() ->post('https://api.openai.com/v1/chat/completions', [ 'model' => 'gpt-4o', 'messages' => [ ['role' => 'user', 'content' => $prompt], ], ]); return $this->parseResponse((array) $aiQuery->json()); } catch (Exception $e) { captureException($e); // Sends the exception to Sentry return 'We were unable to generate the content at this time. Please try again later.'; } } /** @phpstan-ignore-next-line */ private function parseResponse(array $response): string { return $response['choices'][0]['message']['content']; }}When calling getHeader() or getFooter(), we render a Blade view that contains the prompt for the OpenAI API:
resources/views/text-generation/openai/header.blade.php
Rules: - The header should be a maximum of 300 characters.- The header should contain some of the links provided.- Reader should be enticed to click on the links.- The header should be engaging and informative.- The header should be written in a professional tone.- The header should be grammatically correct.- The header should be free of spelling errors.- Ensure the header is not misleading or deceptive.- The header should be relevant to the links provided.- Act as a news outlet and provide a headline for the links. --- Links: @foreach($linkTitles as $linkTitle) { - {{ $linkTitle }}@endforeach --- Question: Given the links and rules, generate a suggested header for an Email to be sent out.And the same for the footer:
resources/views/text-generation/openai/footer.blade.php
Rules: - The footer should be a maximum of 300 characters.- Reader should be enticed to click on the links.- The footer should be engaging and informative.- The footer should be written in a professional tone.- The footer should be grammatically correct.- The footer should be free of spelling errors.- Ensure the footer is not misleading or deceptive.- The footer should be relevant to the links provided.- Acting as a news outlet - provider user for incentive to follow us and read more. --- Links: @foreach($linkTitles as $linkTitle) { - {{ $linkTitle }}@endforeach --- Question: Given the links and rules, generate a suggested footer for an Email to be sent out.Then, these prompts are sent to the OpenAI API, and the response is parsed to get the generated text.
Note: When using an Interface, we must define the methods in the Interface. However, that does not limit us from creating additional methods in the implementation. In this case, we have callOpenAI() and parseResponse().
The last thing to do is to set up the OpenAI API key in the .env file:
.env
OPENAI_KEY=your-openai-keyNote: Add this to the .env.example file as well (remove the actual value).
And, of course, we need to add a config key:
config/services.php
<?php return [ // ... 'ai' => [ 'openai' => [ 'key' => env('OPENAI_KEY'), ], ],];Adding Controller
Now that we have our Service ready let's add a Controller to handle the requests:
app/Http/Controllers/TextGenerationController.php
use App\Http\Requests\TextGenerationRequest;use App\Services\TextGeneration\TextGenerationService;use Exception;use Illuminate\Http\JsonResponse; class TextGenerationController extends Controller{ public function __invoke(TextGenerationRequest $request, TextGenerationService $textGenerationService): JsonResponse { return response()->json([ 'text' => match ($request->input('type')) { 'header' => $textGenerationService->getHeader((int) auth()->id(), $request->string('provider')), 'footer' => $textGenerationService->getFooter((int) auth()->id(), $request->string('provider')), default => throw new Exception('Provider not supported'), // Required for phpstan. }, ]); }}And, of course, a Request to validate the input:
app/Http/Requests/TextGenerationRequest.php
use App\Enums\TextGenerationProviders;use Illuminate\Foundation\Http\FormRequest; class TextGenerationRequest extends FormRequest{ /** * @return array<string, list<string>> */ public function rules(): array { return [ 'type' => ['string', 'in:header,footer'], 'provider' => ['required', 'string', 'in:'.collect(TextGenerationProviders::cases())->pluck('value')->implode(',')], ]; } public function authorize(): bool { return true; }}Note: Take a look at the provider rule. We are using the Enum to get all the supported providers and then using implode() to create a string with all the values separated by a comma.
Adding Routes
Let's add the route for our Controller:
routes/web.php
use App\Http\Controllers\TextGenerationController; // ... Route::middleware('auth')->group(function () { // ... Route::post('text-generation', TextGenerationController::class)->name('text-generation');}); // ...You might have a question here - why did we create an "API-like" route in our web routes folder?
The answer is simple - this route is meant for an already authenticated user using web authentication. If we were to create this as an API route, we would have to implement API authentication. But we will never make this route public, so we can use the web middleware.
Note: This decision can be controversial, but it's just a way to add "API-like" functionality (like calling an endpoint with a GET/POST request) to the authenticated user.
Adding Action Buttons
Now that we have our backend ready, let's add the buttons to the frontend:
resources/views/issues/create.blade.php
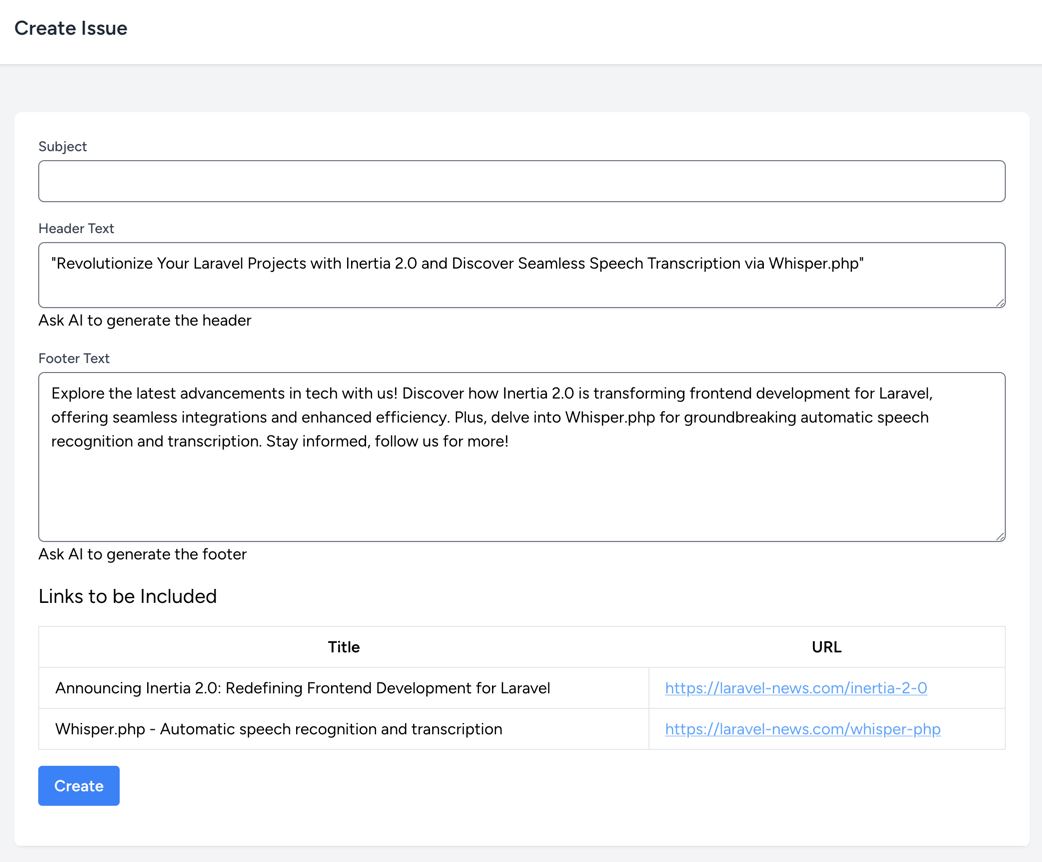
{{-- ... --}} <form method="POST" action="{{ route('issues.store') }}"> {{-- ... --}} <div class="mb-4"> <label for="header_text" class="block text-sm font-medium text-gray-700">Header Text</label> <textarea name="header_text" id="header_text" class="form-textarea rounded-md shadow-sm mt-1 block w-full">{{ old('header_text') }}</textarea> <button type="button" onclick="generateText('header', 'openai')" class="underline"> Ask AI to generate the header </button> @error('header_text') <p class="text-red-500">{{ $message }}</p> @enderror </div> <div class="mb-4"> <label for="footer_text" class="block text-sm font-medium text-gray-700">Footer Text</label> <textarea name="footer_text" id="footer_text" class="form-textarea rounded-md shadow-sm mt-1 block w-full">{{ old('footer_text') }}</textarea> <button type="button" onclick="generateText('footer', 'openai')" class="underline"> Ask AI to generate the footer </button> @error('footer_text') <p class="text-red-500">{{ $message }}</p> @enderror </div> {{-- ... --}} </form> {{-- ... --}} <script> function generateText(type, provider) { fetch('/text-generation', { method: 'POST', headers: { 'Content-Type': 'application/json', 'X-CSRF-TOKEN': document.querySelector('meta[name="csrf-token"]').getAttribute('content') }, body: JSON.stringify({ type, provider: provider }) }) .then(response => response.json()) .then(data => { if (type === 'header') { document.getElementById('header_text').value = data.text; } else { document.getElementById('footer_text').value = data.text; } }); }</script> If we load the page, we will see two buttons that will generate the text for the header and footer. The text will be automatically added to the textarea:

Testing
Time to test our new feature! Let's add a test that Mocks the OpenAI API and checks if everything works as expected:
tests/Feature/TextGeneration/OpenAITest.php
use App\Enums\TextGenerationProviders;use App\Models\User;use App\Services\TextGeneration\TextGenerationService;use Illuminate\Foundation\Testing\RefreshDatabase; use function Pest\Laravel\actingAs;use function Pest\Laravel\postJson; uses(RefreshDatabase::class); test('can generate header text', function () { $user = User::factory()->create(); $this->instance( TextGenerationService::class, Mockery::mock(TextGenerationService::class, function ($mock) { $mock->shouldReceive('getHeader')->once()->andReturn('Generated header text'); }) ); actingAs($user); $request = postJson(route('text-generation'), [ 'type' => 'header', 'provider' => TextGenerationProviders::OPENAI->value, ]); $request->assertStatus(200); $request->assertExactJson([ 'text' => 'Generated header text', ]);}); test('can generate footer text', function () { $user = User::factory()->create(); $this->instance( TextGenerationService::class, Mockery::mock(TextGenerationService::class, function ($mock) { $mock->shouldReceive('getFooter')->once()->andReturn('Generated footer text'); }) ); actingAs($user); $request = postJson(route('text-generation'), [ 'type' => 'footer', 'provider' => TextGenerationProviders::OPENAI->value, ]); $request->assertStatus(200); $request->assertExactJson([ 'text' => 'Generated footer text', ]);});We can run our test suite and see that everything is working as expected:
php artisan test --filter=OpenAITest
To read more about mocking, you can check out Official Laravel Documentation.
We are now ready to allow our client to generate text for the header and footer. In the next lesson, we will start working on production deployment - specifically, backups!
No comments yet…