Our client was happy with the deployment, but they were not happy that the website was down for a while, during the deployment. And that makes sense! We have our script set up to take our application down:
cd /home/forge/v2.linksletter.comif [ -f artisan ]; then $FORGE_PHP artisan downfi git pull origin $FORGE_SITE_BRANCH$FORGE_COMPOSER install --no-dev --no-interaction --prefer-dist --optimize-autoloader npm installnpm run build rm -rf /node_modules if [ -f artisan ]; then $FORGE_PHP artisan cache:clear $FORGE_PHP artisan view:clear $FORGE_PHP artisan route:cache $FORGE_PHP artisan config:cache $FORGE_PHP artisan view:cachefi ( flock -w 10 9 || exit 1 echo 'Restarting FPM...'; sudo -S service $FORGE_PHP_FPM reload ) 9>/tmp/fpmlock if [ -f artisan ]; then $FORGE_PHP artisan migrate --force $FORGE_PHP artisan upfiSpecifically, the artisan down and artisan up commands. They take our application into maintenance mode for a few minutes. Let's look at Forge's deployment history:
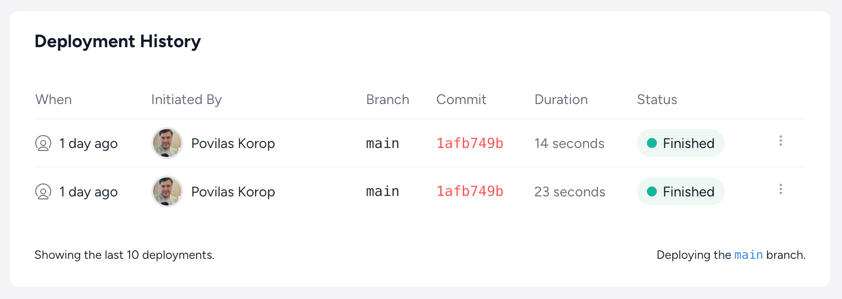
It takes 10-20 seconds; imagine if our application grew in complexity and size. This can grow exponentially!
So, what are our solutions? We can use a zero-downtime deployment tool like official Laravel Envoyer.
There are also other alternatives:
But for this tutorial, we chose Envoyer because it's a first-party tool from Laravel team.
Let's set it up!
Configuring Envoyer
To set up Envoyer, we must go to the Envoyer website and sign up for an account. Once we have an account, we can start the import process:
-
Open Forge and visit
My Account(top right - click on profile picture for dropdown). -
Click on
Envoyerin the sidebar:

- On this page, find
API Tokenand click on it. It will open a new Envoyer page:

-
Copy the token and return it to Forge. Paste the token in the
API Tokenfield and clickSave. -
Return to the Envoyer page and click
Add Project. Fill out the form:

- Click on
Import from Forgein the window that opens:

- Select the server you want to import and the site:

-
Click
Import Serverand wait for the process to finish. -
Visit the
Deploymentstab and clickAdd Hook. Inside, fill out the form:
cd {{ release }} npm installnpm run build rm -rf /node_modules
- Save it, and move it after
Install Composer Dependencies:

- Click on
Add Hookagain and fill out the form:
cd {{ release }} if [ -f artisan ]; then php artisan cache:clear php artisan view:clear php artisan route:cache php artisan config:cache php artisan view:cache php artisan queue:restartfi
- Save it, and move it after
NPM Compilation:

- Click on
Add Hookagain and fill out the form:
cd {{ release }} php artisan migrate --force
- Save it and move it after
Install Composer Dependencies:

-
Click on
Deployat the top of the page -
Go into the
Deploymentstab and look for your deployment. Click theRight facing arrowto see the deployment log:

- Once the deployment is done, you should see all the hooks being green:

-
Go back to Forge and visit your site.
-
Go into
Settingsand change theWeb Directoryto/current/public:

- Visit your site and see if it's working.
That's it! Your website is now working with zero-downtime deployments!
Cleaning Up
After the Envoyer is set up, we have a mess to clean up. If we ssh into the server and do ls - we can see that there are a lot of folders:

In this case, we can follow what Official Migration Guide says:
You should now tidy your site directory by ensuring it only contains the .env file, along with the releases, current, and storage directories. After ensuring you have backed up anything you need, you may remove everything else, including any dotfiles and directories such as .git, .gitattributes, etc.
Of course, make sure to back up everything before you delete it! Once you do that, you should have a clean server:

If you followed along and cleaned up your server - open the website and see that it works. If it does - excellent!

Course Conclusion: We're LIVE - What's Next?
That's it for this course, where we tried to describe our version of proper process for creating a Laravel project from zero to going live.
Now, what should happen AFTER your project is deployed?
Maintenance.
But what does that word actually mean?
Here are a few recommendations for what you should do:
- Keep monitoring bugs with Sentry or your preferred tool. Don't forget to set up notifications so you'll be notified about issues via email, Slack, or the channels you're active on.
- Keep using the GitHub processes we described in this course to fix bugs and create new features. This will help you avoid conflicts and have peace of mind.
- Above all, communication is still the key. Both between the teammates and with the client. Whatever happens with the project currently or plans from the client, keep discussing them together and not separately. This is probably the most important general "project success" advice I can give.
You can access the complete repository here on GitHub.
No comments yet…